
That faint hum from your AC unit, it’s working harder than it should. It’s fighting a battle against an invisible enemy clinging to its heart: dirty coils. You can clean them yourself. It’s not a mystery reserved for technicians.
With the right approach, you can restore your system’s efficiency, slash your energy bills, and breathe easier. The process is straightforward if you respect the safety steps. Keep reading to learn how to give your HVAC system the fresh start it deserves.
Key Takeaways
- Clean coils are essential for efficient cooling and good indoor air quality.
- The right tools and a methodical approach make DIY cleaning safe and effective.
- Regular maintenance, including annual cleaning, prevents major system failures.
The Unseen Engine of Your Comfort
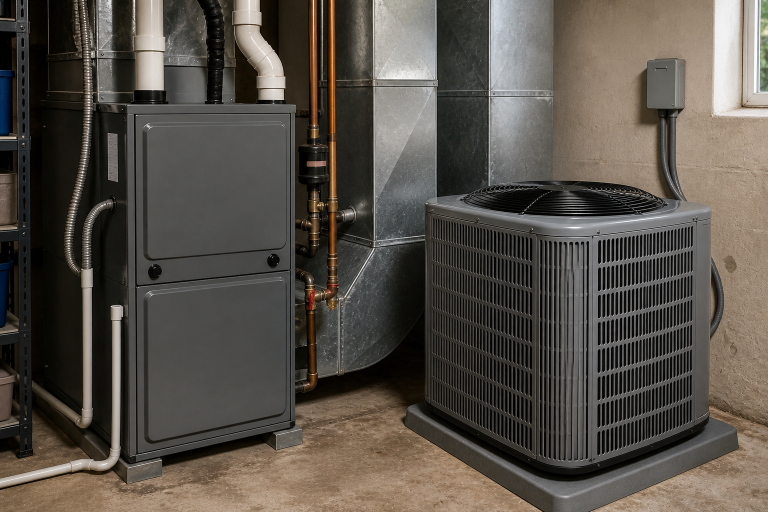
Your HVAC system is the quiet engine of your home’s comfort. And at the center of that engine are two sets of coils. The evaporator coil, hidden inside, absorbs heat from your home’s air.
The condenser coil, outside, releases that heat into the outdoors. They work like a team, transferring thermal energy to keep you cool. But they can’t do their job if they’re coated in grime.
A layer of dirt acts like a winter coat on the coils. It insulates them, preventing proper heat exchange. Your system has to run longer and strain harder to achieve the same temperature.
Why Dirty Coils Hurt Efficiency, Air Quality, and Your Energy Bills
You hear it in the constant, labored hum. You see it on your monthly energy bill. That dust and debris also become a breeding ground for mold and bacteria, which then get circulated through your vents. It’s a problem you feel in your wallet and your lungs.
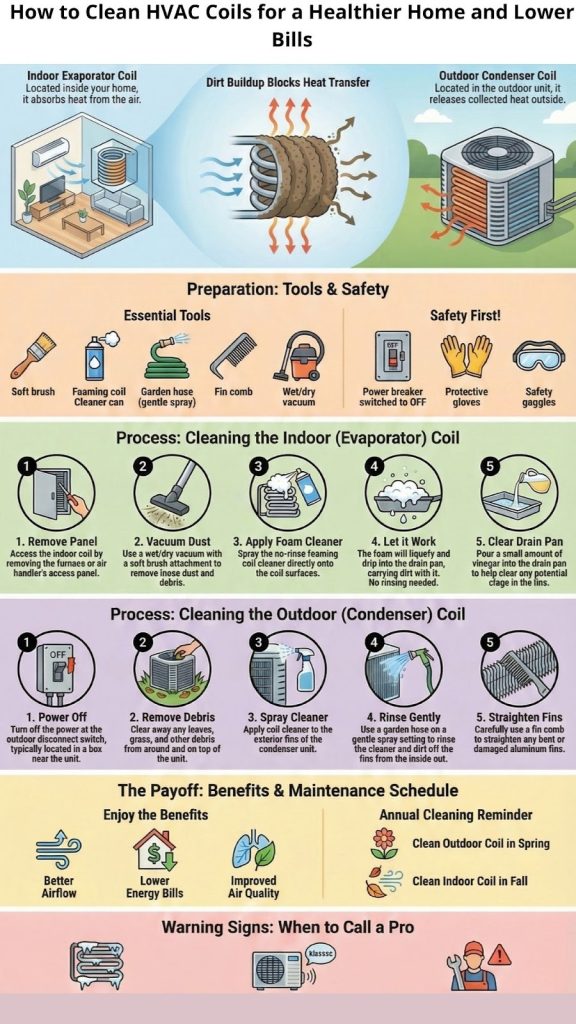
- Evaporator Coil: Absorbs indoor heat, located inside the air handler.
- Condenser Coil: Releases heat outdoors, located in the outdoor unit.
- Heat Transfer: The core function hampered by dirt buildup.
The good news is that reclaiming your system’s efficiency is within your reach. You don’t need to be a certified technician. You just need to understand the process, gather a few specific tools, and follow the safety rules. It’s a project that pays for itself almost immediately.
Gathering Your Arsenal for the Job
Before you touch the unit, you need the right gear. This isn’t a job for a rag and some soapy water. Using the wrong products can cause permanent damage. Harsh chemicals can corrode the delicate aluminum fins. A high-pressure washer can bend them beyond repair. Your goal is to clean gently but thoroughly.
They foam up to cling to vertical surfaces, dissolving the gunk without needing a rinse that could cause water damage.
- Soft-bristle brush
- Fin comb for straightening bent fins
- Garden hose
- Spray nozzle with a gentle shower setting
Safety is non-negotiable. You are working with electricity and chemicals, which is why understanding proper electrical safety for HVAC systems is critical before touching any components.
Always turn the system’s power off at the breaker box before you start.
Wear nitrile gloves and safety goggles to protect your skin and eyes from cleaner residue. If you’re cleaning the indoor coil, have a wet/dry vacuum handy to clear the drain line. Having everything in one place before you start makes the whole process smoother and safer.
Taming the Indoor Beast: The Evaporator Coil
This is the part most homeowners never see. It’s tucked away inside your air handler, usually in the attic, basement, or a closet. Start by flipping the breaker for your HVAC system. This is the most critical safety step.
Locate the access panel on the air handler; it’s often held on by a few screws. Removing it reveals the evaporator coil, which probably looks like a dark, fuzzy A-shaped finned surface.
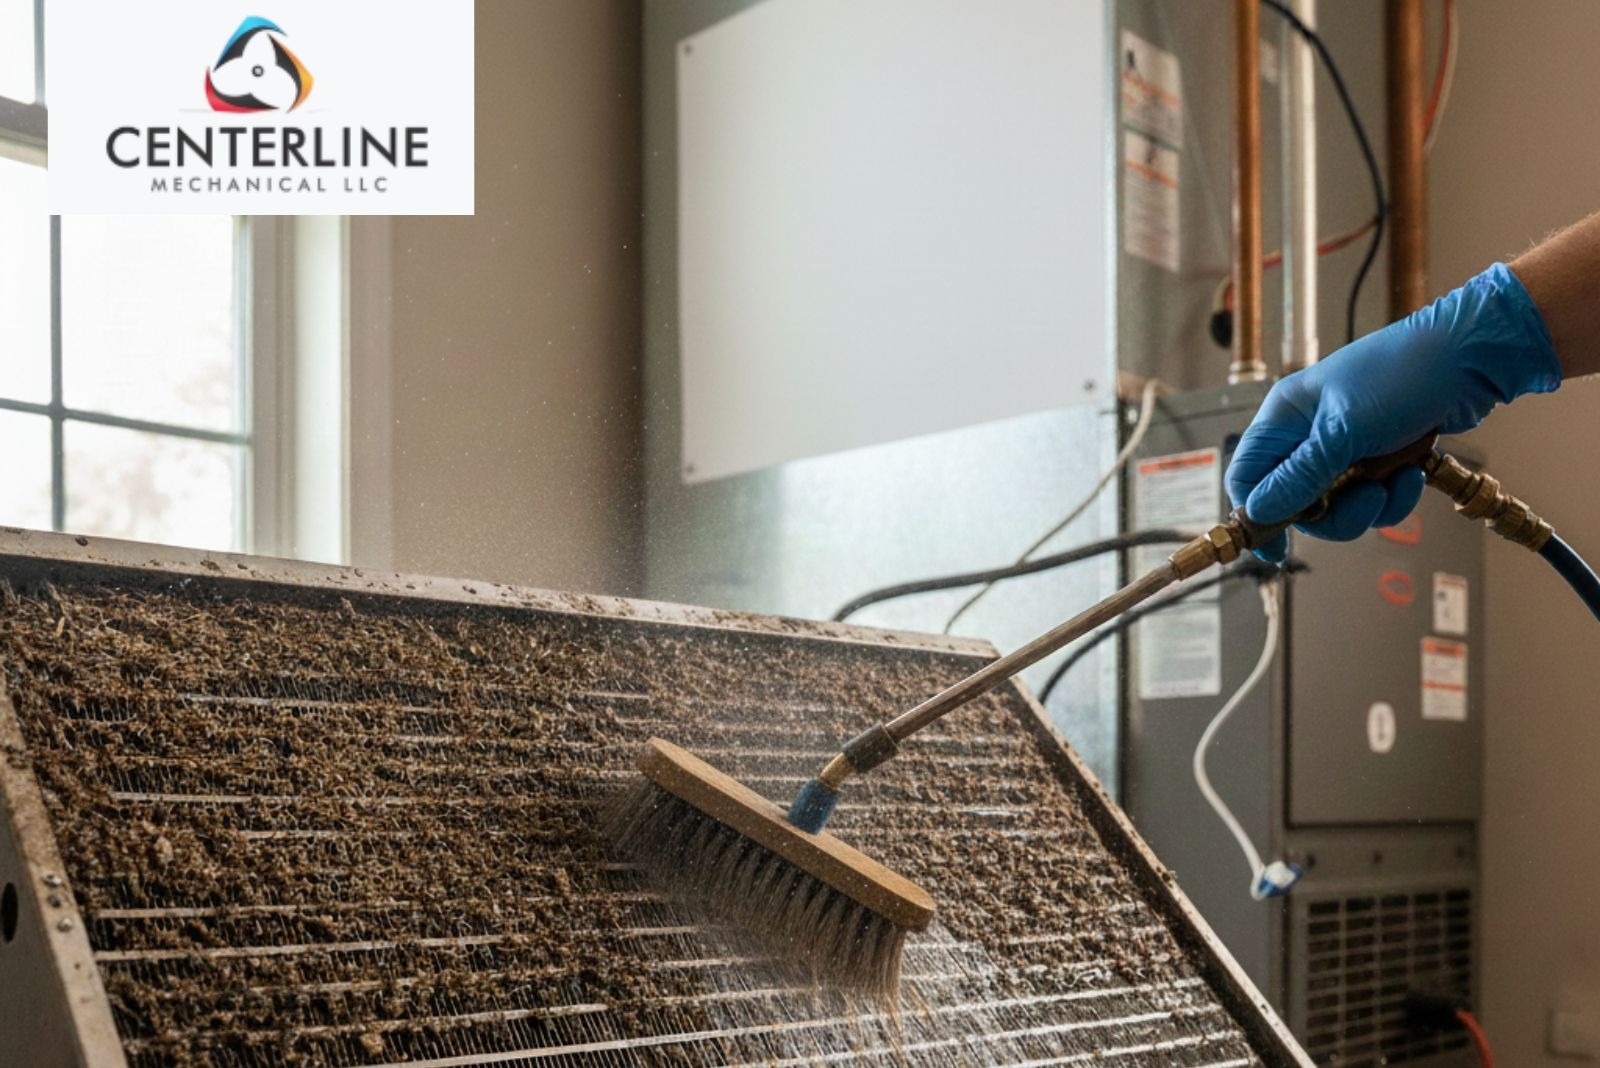
Use a vacuum with a soft brush attachment to remove the top layer of loose dust. Be gentle. Then, shake the can of foaming coil cleaner and apply it evenly across the coil’s surface. The foam will expand, working its way into the crevices.
Indoor Coil Cleaning and Drain Pan Maintenance
Let it sit for the time recommended on the can, usually five to ten minutes. This dwell time allows the chemicals to break down the stubborn dirt and biological growth.
- Use a wet/dry vacuum to clear the condensate drain line
- Let the cleaner sit for the recommended dwell time
- Do not rinse the indoor coil
- Allow cleaner and dirt to drip into the drain pan
- Reattach the access panel
- Indoor cleaning is complete
While the cleaner is working, it’s a perfect time to address the drain pan. Pour a cup of white vinegar into the pan to kill any algae.
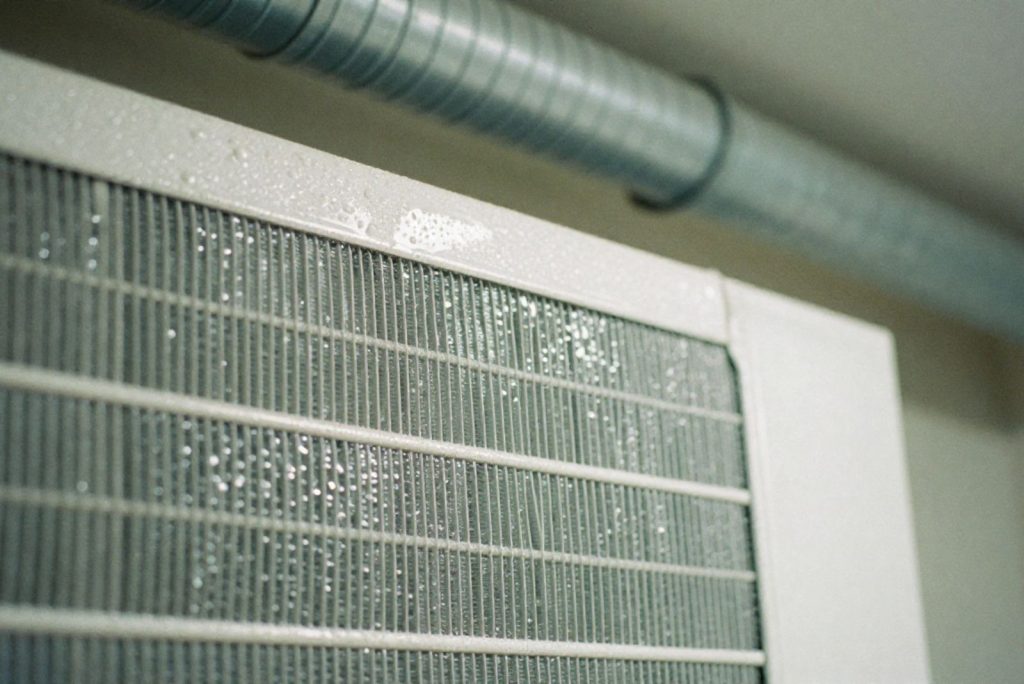
Conquering the Outdoor Unit: The Condenser Coil
Credits: Ryan Rutter (Rutter Realty Gulf Coast)
The outdoor condenser unit takes the brunt of the elements, especially in systems like rooftop HVAC units (RTUs) that are fully exposed to sun, wind, and debris year-round. It’s exposed to pollen, grass clippings, leaves, and salt air.
This gives it time to cut through the greasy film that often accumulates outside. Then, thoroughly rinse the coil with your hose, again using low pressure. You want to wash all the dissolved grime away.
Follow these simple steps to safely clean outdoor AC coils, improving airflow, efficiency, and performance without special tools or experience.
- Turn off power at the outdoor disconnect box near the unit.
- Remove leaves, vines, and debris from around the unit.
- Gently rinse fins from the inside out using a hose.
- Spray outdoor coil cleaner evenly over all fins.
- Let the cleaner foam and sit for the recommended time.
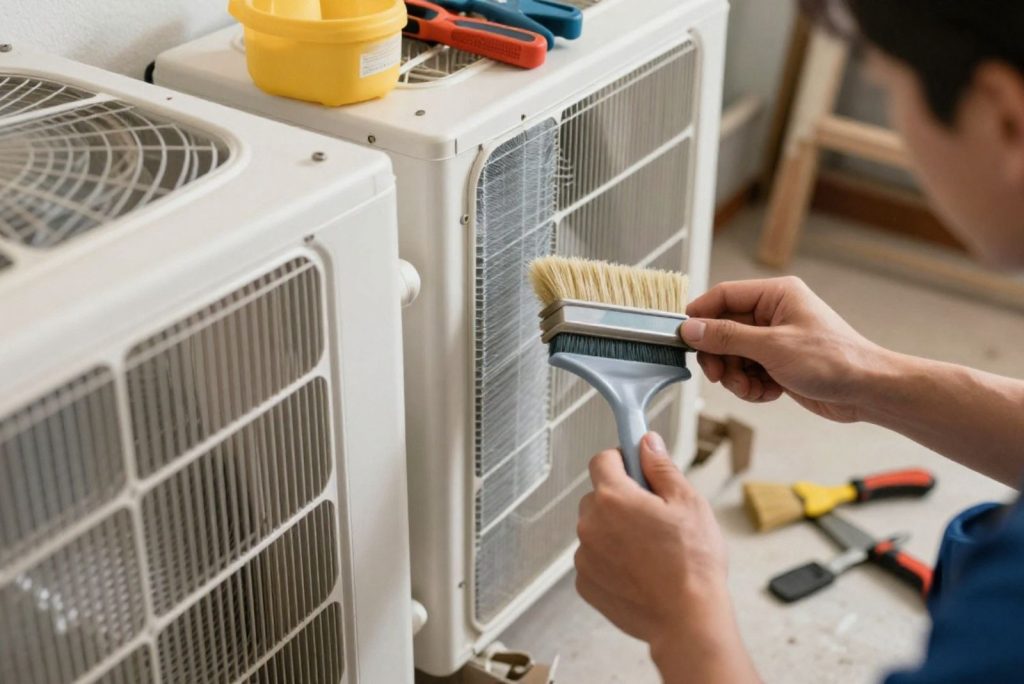
Once the coil is clean and dry, take a close look at the fins. It’s common to see a few bent over. This restricts airflow. Gently use a fin comb to straighten them. The comb has spacers that match the fin density. Slide it over the bent fins to carefully lift them back into alignment.
Creating Clean Coils a Habit
| Home Condition | Evaporator Coil Cleaning | Condenser Coil Cleaning | Why It Matters |
| Average household | Once per year | Once per year (spring) | Maintains efficiency and airflow |
| Homes with pets | Every 6–9 months | Every 6 months | Pet hair increases buildup |
| Dusty or construction areas | Every 3–6 months | Every 3–6 months | Heavy debris accelerates fouling |
| Coastal environments | Every 6 months | Every 3–6 months | Salt air causes corrosion |
| Neglected systems | Initial deep clean | Initial deep clean | Restores lost performance |
How often should you do this? For most homes, an annual cleaning is sufficient. A good rule is to clean the outdoor condenser coil every spring, before the heavy cooling season begins. Then, clean the indoor evaporator coil every fall. If you live in a particularly dusty area, have pets that shed, or are near construction, you might need to do it more often.
- Your air filter stops dust before it reaches sensitive HVAC components (1).
- Higher-quality filters capture more airborne particles.
- Routine replacements keep airflow strong and protection consistent.
- A clean filter keeps dirt off the evaporator coil.
- Dirty filters force dust past the filter and onto system components.
- Regular changes reduce the need for deep coil cleanings.
- Small maintenance steps lead to better efficiency and longer system life.
There are times to call a professional. If you see signs of ice on the coils, hear unusual noises, or suspect a refrigerant leak, don’t attempt a DIY fix.
A professional NATE-certified technician has the tools for a deep steam clean or chemical flush and can handle complex system issues. But for routine maintenance, a careful homeowner can handle the coil cleaning.
This simple step can significantly improve airflow and efficiency by restoring proper CFM (cubic feet per minute) throughout the system.
FAQs
What are HVAC coils?
HVAC coils are metal parts inside your heating and cooling system that help move heat. There are two main types: indoor coils and outdoor coils. The indoor coil pulls heat from your home’s air, while the outdoor coil releases that heat outside. When coils are clean, air moves better and your system works smoothly. Dirty coils make the system work harder and waste energy (2).
Why do HVAC coils get dirty?
HVAC coils get dirty because air always carries dust, pollen, and small debris. Even with a filter, some particles still pass through. Outdoor coils also collect grass, leaves, and dirt from outside. Over time, this buildup sticks to the coils. When dirt piles up, it blocks airflow and heat movement, which makes your system less effective and more expensive to run.
How do dirty coils raise energy bills?
Dirty coils stop heat from moving the way it should. When this happens, your HVAC system must run longer to cool or heat your home. Running longer uses more electricity. This extra effort shows up as higher energy bills each month. Clean coils help the system work faster and easier, saving energy and reducing wear on important parts over time.
Can dirty coils affect my health?
Yes, dirty coils can affect your health. Dust, mold, and bacteria can grow on coils when moisture is present. These germs can spread through the air vents and into your home. This may cause allergies, coughing, or breathing problems. Cleaning coils helps improve indoor air quality and makes the air in your home feel fresher and healthier for everyone.
Is it safe to clean HVAC coils myself?
It can be safe if you follow the right steps. Always turn off the power before starting. Use gentle tools and approved coil cleaners. Never use strong chemicals or high water pressure. Wearing gloves and safety glasses helps protect you. If something looks damaged or confusing, it is safer to stop and call a professional for help.
How often should HVAC coils be cleaned?
Most homes should clean HVAC coils once a year. The outdoor coil is best cleaned in spring, before summer heat starts. The indoor coil is often cleaned in fall. If you have pets, live in a dusty area, or see heavy dirt, you may need to clean them more often to keep the system working well.
What tools do I need to clean coils?
You need simple and safe tools. These include a soft brush, a garden hose with gentle spray, coil cleaner made for HVAC systems, gloves, and safety glasses. A fin comb helps straighten bent fins. For indoor coils, a wet/dry vacuum can clear the drain line. Using the right tools helps avoid damage and keeps cleaning effective.
Should I rinse the indoor coil?
No, you should not rinse the indoor coil with water. Indoor coil cleaners are made to clean without rinsing. The dirt and cleaner drip into the drain pan and flow out through the drain line. Adding water can cause leaks or water damage inside your home. Always follow the cleaner’s instructions for safe results.
What signs tell me coils need cleaning?
Signs include higher energy bills, weak airflow, uneven cooling, or the system running longer than usual. You may hear louder sounds or notice warm air when cooling should be strong. Some people also notice more dust in the home. These clues often mean the coils are dirty and need attention to restore proper performance.
When should I call a professional?
Call a professional if you see ice on the coils, hear strange noises, or suspect a refrigerant leak. These problems need special tools and training. If coils are very dirty or hard to reach, a technician can do a deep clean safely. Professionals also check other parts to make sure your whole system works together properly.
Your System’s New Lease on Life
Cleaning your HVAC coils isn’t just a chore. It’s an investment in your home’s efficiency and your family’s health. You’re removing a burden your system has been carrying for months, maybe years. You’ll likely notice the difference almost immediately,quieter operation, more consistent cooling, and the satisfaction of knowing the air you’re breathing is cleaner.
For a professional assessment or a comprehensive system tune-up, consider scheduling a service with Centerlinemech. Their technicians can ensure every component of your HVAC system is working in harmony, giving you complete peace of mind.
References
- https://pmc.ncbi.nlm.nih.gov/articles/PMC7498932/
- https://www.researchgate.net/publication/237664900_Dirty_air_conditioners_Energy_implications_of_coil_fouling